
Red Light Therapy at Home: Safe Setup and Best Results
Red light therapy at home can be a practical way to support recovery, skin health, joint comfort, and daily wellness, but the results depend heavily on how you set it up. The same device can feel underwhelming, effective, or irritating depending on wavelength, distance, session length, treatment consistency, and whether you are using it for the right goal.
The good news is that a safe home setup does not have to be complicated. You need a suitable device, a repeatable routine, realistic expectations, and a few safety habits that prevent the most common mistakes.
This guide walks through how to choose your treatment area, position your device, dose sessions appropriately, and get better results from red light therapy at home without overdoing it.
What Red Light Therapy at Home Actually Does
Red light therapy, also called photobiomodulation, uses specific bands of red and near-infrared light to interact with cells. Red wavelengths, often around 630 to 660 nm, are commonly used for skin and surface-level tissue. Near-infrared wavelengths, often around 810 to 850 nm, can reach deeper tissues and are commonly used for muscle, joint, and recovery applications.
The therapy is not a tanning lamp, heat lamp, or UV treatment. It should not burn the skin when used correctly. Instead, research on photobiomodulation mechanisms suggests that light may influence mitochondrial activity, inflammation signaling, blood flow, and cellular repair processes.
That does not mean every claim online is proven. Red light therapy is best viewed as a supportive tool, not a stand-alone cure. It may help certain people with skin appearance, soreness, stiffness, recovery, and localized discomfort, especially when the device is well designed and used consistently.
For example, a controlled trial published in Photomedicine and Laser Surgery reported improvements in skin complexion and collagen density after red and near-infrared light exposure, though outcomes depend on device parameters and treatment consistency. You can review the study through the National Library of Medicine. A 2025 systematic review (Photobiomodulation, Photomedicine, and Laser Surgery) reaffirmed that home-use PBM devices show measurable skin and recovery benefits when wavelength, distance, and session duration are tracked consistently.
Start With the Right Device for Your Goal
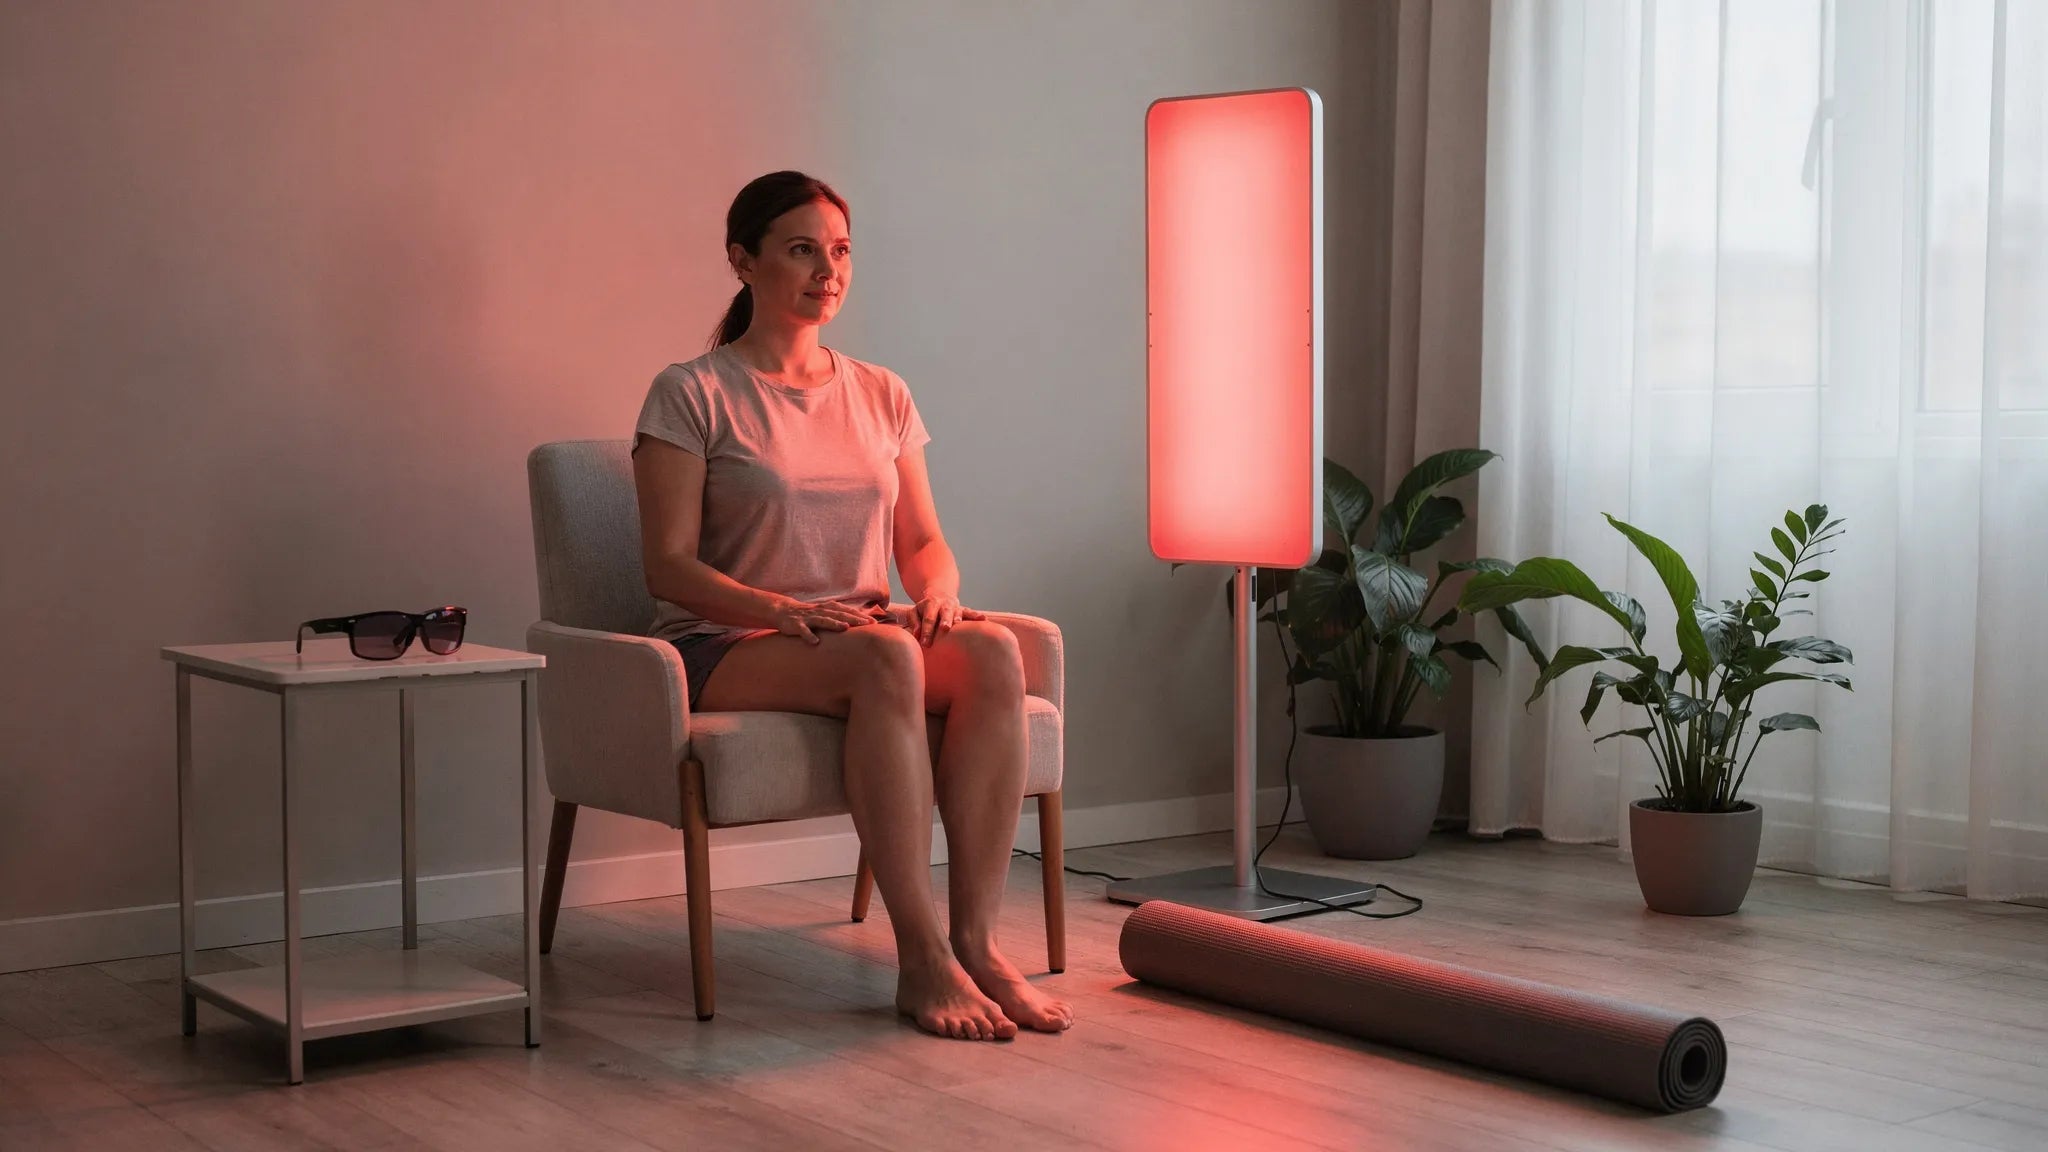
A safe setup begins before you turn the device on. Different home devices treat different areas, and bigger is not always better. A large panel is convenient for broad coverage, while a flexible pad such as the HealthLight Ultimate Body Kit may be better for wrapping around a knee, shoulder, foot, or lower back.
If you are comparing devices, pay close attention to wavelength, irradiance, treatment area, timer controls, FDA status, warranty, and whether the manufacturer provides clear usage instructions. FDA clearance can be especially useful for medical or therapeutic claims, while FDA registration alone does not prove that a device is effective for a specific condition. For a deeper buying framework, see our guide to medical grade red light therapy vs consumer devices.
| Device type | Best fit | Setup considerations |
|---|---|---|
| Large panel | Back, legs, torso, general wellness, athletic recovery | Requires stable mounting, consistent distance, and enough space to stand or sit comfortably |
| Flexible pad | Joints, feet, neck, shoulders, lower back, targeted pain areas | Can sit close to the skin, but straps should not restrict circulation |
| Face mask | Skin care, facial redness, texture, acne-focused routines if blue light is included (e.g., the TheraFace Mask) | Use only as directed and protect eyes if the manufacturer recommends it |
| Handheld device | Small joints, trigger areas, spot treatments | Easy to underdose or move inconsistently, so use a timer and keep placement steady |
| Full-body system | Broad wellness routines, clinics, high-frequency users — including clinician-grade systems like the BIOFLEX MultiPort System | Requires more space, careful electrical setup, and a larger budget |
As a general rule, choose the smallest device that can treat your main target area effectively. If you mainly want knee comfort, a full-body panel may be unnecessary. If you want broad muscle recovery after training, a small handheld may be too slow to use consistently.
Safe Setup: The Home Environment Matters
Red light therapy is usually simple to use, but the surrounding environment still matters. Treat it like a professional wellness device, not a casual lamp.
Set up in a dry, stable, uncluttered area. Avoid placing the device near bathtubs, showers, sinks, hot tubs, or anywhere water might splash. Keep cords out of walking paths, inspect cables regularly, and avoid running high-powered devices through overloaded extension cords. If your device includes a stand or wall mount, make sure it is fully tightened before each session.
Good positioning also improves dose consistency. Mark your usual chair, mat, or standing position with tape so you are not guessing each time. If your device manual recommends 6 inches, 12 inches, or direct skin contact, use that distance as your starting point. Moving twice as far away can significantly reduce the light reaching your skin.

Eye Safety: Do Not Treat Brightness as Harmless
Red and near-infrared light are not the same as UV light, but eye safety still deserves attention. Some red light devices are extremely bright, and near-infrared light may be invisible while still reaching the eye.
Follow the manufacturer instructions for eye protection. For bright panels, many users wear appropriate goggles or keep eyes closed and turned away from the light. Face masks and lower-powered devices may have different instructions, so do not assume one rule applies to every device.
Be especially careful if you have a history of eye disease, retinal issues, recent eye surgery, migraines triggered by bright light, or light sensitivity. In those cases, ask an eye care professional before starting.
Skin Prep and Positioning for Better Results
Clean, dry skin is usually best. Heavy lotions, sunscreen, thick makeup, or clothing can block or scatter light, reducing how much reaches the target tissue. If you are treating skin care goals, remove makeup first. If you are treating a knee, back, shoulder, or foot, expose the area unless your device manual says treatment through thin fabric is acceptable.
Avoid applying photosensitizing products right before a session unless a clinician has cleared it. Retinoids, exfoliating acids, certain acne products, and some medicated creams can increase irritation in sensitive users. The same caution applies if you take photosensitizing medications.
Positioning should be repeatable. For a joint, treat the front and sides if the device and protocol allow it. For muscle recovery, cover the main muscle group rather than chasing tiny sore spots. For skin care, keep the same distance and angle each session so progress photos are meaningful.
Your First At-Home Session: A Simple Safe Protocol
Start lower than you think you need. Red light therapy often follows a biphasic dose response, meaning too little may do very little, while too much can also reduce the benefit or irritate tissue. More time is not automatically better.
- Read the device manual and identify the recommended distance, session length, and eye protection instructions.
- Start with one treatment area rather than treating your entire body on day one.
- Use a short test session of 3 to 5 minutes if you have sensitive skin or a history of light sensitivity.
- Wait 24 hours and check for unusual redness, rash, headache, eye discomfort, increased pain, or irritation.
- If tolerated, move to the lower end of the recommended treatment range, often 5 to 10 minutes for many panels and masks.
- Keep the same distance and time for at least 2 weeks before changing the protocol.
- Track symptoms, sleep, soreness, skin changes, or mobility so you can tell whether the routine is helping.
Do not increase distance, time, frequency, and treated area all at once. If something feels off, you will not know which variable caused the problem.
Best Results: Match the Protocol to the Goal
There is no universal red light therapy schedule that works for every person and every device. The best protocol depends on the device output, treatment distance, target tissue, and reason for use. Always let the manufacturer instructions and your clinician override general guidance.
That said, most home users do better with moderate, consistent sessions than occasional long sessions.
| Goal | Common target area | Practical starting range | Best-result tip |
|---|---|---|---|
| General wellness | Torso, legs, back, or large muscle groups | 5 to 10 minutes per area, 3 days per week | Build consistency before adding time |
| Muscle recovery | Trained muscles, calves, quads, hamstrings, shoulders | 10 to 15 minutes per area, 3 to 5 days per week | Use after training or on recovery days, not as a replacement for sleep and nutrition |
| Joint stiffness or discomfort | Knee, hip, shoulder, hand, ankle, or lower back | 10 to 20 minutes per area, 4 to 5 days per week | Give it 4 to 8 weeks before judging results |
| Skin care | Face, neck, chest, or scalp if indicated | 5 to 10 minutes, 3 to 5 days per week | Take photos every 2 weeks under the same lighting |
| Weight-loss support | Abdomen, hips, thighs, or full-body routine | 10 to 20 minutes per treatment area, 3 to 5 days per week | Pair with exercise, protein intake, sleep, and calorie awareness |
For pain-focused routines, see our full guide to red light therapy for pain relief. If you are still deciding between device formats, our guide to the best red light therapy panels explains the key specs to compare.
The Most Common Home-Use Mistakes
Most disappointing results come from either underdosing, overdosing, or using a device that does not match the goal. The following mistakes are easy to fix.
| Mistake | Why it causes problems | Better approach |
|---|---|---|
| Treating through clothing | Fabric can block or scatter light | Expose clean, dry skin unless the device instructions say otherwise |
| Sitting too far away | Irradiance drops with distance | Use the recommended treatment distance and mark your position |
| Using maximum time every day | Too much exposure can irritate skin or reduce benefit | Start low and increase only if needed |
| Switching routines constantly | You cannot tell what is working | Keep one protocol for at least 2 to 4 weeks |
| Ignoring device specs | Weak bulbs or vague products may not deliver enough light | Look for wavelength, irradiance, treatment area, safety data, and warranty |
| Treating serious symptoms without evaluation | Pain, swelling, numbness, or wounds may need medical care | Get a diagnosis and use light therapy as an adjunct when appropriate |
If you are building a broader home wellness space, also think about how devices interact with your schedule and budget. Some people combine red light therapy with compression boots, percussion therapy, mobility work, or hydrotherapy.
When to Check With a Clinician First
Red light therapy is non-invasive, but certain situations call for medical guidance. Speak with a healthcare professional before using red light therapy at home if you are pregnant, have active cancer or are treating near a tumor site, take photosensitizing medications, have a seizure disorder triggered by flashing light, have significant eye disease, have uncontrolled diabetes with reduced sensation, or have a complex medical condition.
Also get medical advice for unexplained swelling, suspected blood clot, infection, fever, severe new pain, open wounds, or post-surgical treatment areas unless your surgeon or physical therapist has approved the protocol.
Stop using the device and seek guidance if you develop burns, blistering, persistent rash, eye pain, dizziness, worsening symptoms, or unusual neurological changes. Red light therapy should feel gentle. Heat, pain, or irritation is a sign to reassess distance, time, device quality, or whether the therapy is appropriate for you.
How to Track Progress Without Guessing
Red light therapy results are often gradual. Skin changes may take several weeks. Joint comfort or soreness may improve sooner for some users, but chronic issues often require a longer trial. The key is to track enough information to separate real progress from wishful thinking.
Use the same simple metrics each week. For skin care, take photos in the same room, with the same lighting, at the same time of day. For pain or stiffness, rate discomfort from 0 to 10 before treatment and again the next morning. For athletic recovery, track soreness, range of motion, workout quality, and sleep.
Avoid judging your device after one or two sessions. A fair home trial is usually 4 to 8 weeks of consistent use, unless you experience irritation or your clinician recommends stopping sooner.
How Red Light Fits Into a Complete Recovery Routine
Red light therapy works best when it supports the basics. Sleep, protein, hydration, strength training, mobility, and medical care still matter. The device is one part of the system.
For athletes and active adults, a practical routine might include red light after training, compression therapy on heavy leg days, and percussion massage for short muscle-prep sessions. If you want to understand how compression fits into a recovery plan, read our compression therapy guide.
For skin care, pair red light with gentle cleansing, barrier-supporting moisturizers, daily sunscreen, and patience. For discomfort or stiffness, combine it with movement, physical therapy exercises, and professional diagnosis when symptoms are persistent.
Frequently Asked Questions
How often should I use red light therapy at home? Most people start with 3 to 5 sessions per week, depending on the device and goal. Beginners should start at the low end of the time range and increase gradually only if the skin and target area tolerate it well.
How long does it take to see results from red light therapy? Some users notice relaxation or soreness changes within days, but skin, joint, and chronic discomfort goals often require 4 to 8 weeks of consistent use. Progress depends on device quality, dose, condition severity, and lifestyle factors.
Can I use red light therapy every day? Some devices and protocols allow daily use, but daily maximum-dose sessions are not always better. If you are new, start with several sessions per week and add frequency only after you know how your body responds.
Do I need eye protection for red light therapy at home? Follow your device instructions. Bright panels and near-infrared devices may require goggles or careful eye positioning. People with eye conditions, recent eye surgery, or strong light sensitivity should ask an eye care professional first.
Can red light therapy help with weight loss? Red light therapy may support body composition routines when paired with exercise, nutrition, sleep, and consistency, but it should not be treated as a stand-alone fat-loss solution. Results are usually modest and depend on the overall plan.
Is near-infrared light better than red light? Not always. Red light is often preferred for skin and surface-level goals, while near-infrared is commonly used for deeper muscle and joint targets. Many high-quality devices combine both.
Are at-home red light therapy devices HSA/FSA eligible? Yes — medical-grade devices like the HealthLight Ultimate Body Kit, TheraFace Mask, and BIOFLEX MultiPort System are FDA-cleared and HSA/FSA-eligible for documented conditions such as chronic pain, post-surgical recovery, or acne when prescribed by a physician. A Letter of Medical Necessity is typically required, converting the pre-tax purchase to roughly 26-40% in real tax savings depending on your tax bracket.
Ready to Set Up Red Light Therapy at Home?
A good home routine starts with the right device, clear instructions, and support when you need it. Your Health Sanctuary curates professional-grade recovery and wellness devices for home use, including red light therapy, compression therapy, and percussion tools trusted by clinics and athletes.
Get Help Setting Up Your Home Red Light Routine
If you want help comparing device types, wavelengths, treatment coverage, or recovery stacks, our recovery specialists are one call away. Compare the HealthLight Ultimate Body Kit, TheraFace Mask, or BIOFLEX MultiPort System with no pressure and no upsell.
Shop HealthLight Ultimate Body Kit → Speak with Justin's Team: (612) 360-2490All three devices are HSA/FSA eligible with a Letter of Medical Necessity from your physician — for documented chronic pain, post-surgical recovery, acne, or neuropathy, LMN approval is routine and the pre-tax purchase converts to roughly 26–40% in real tax savings depending on your tax bracket.
